
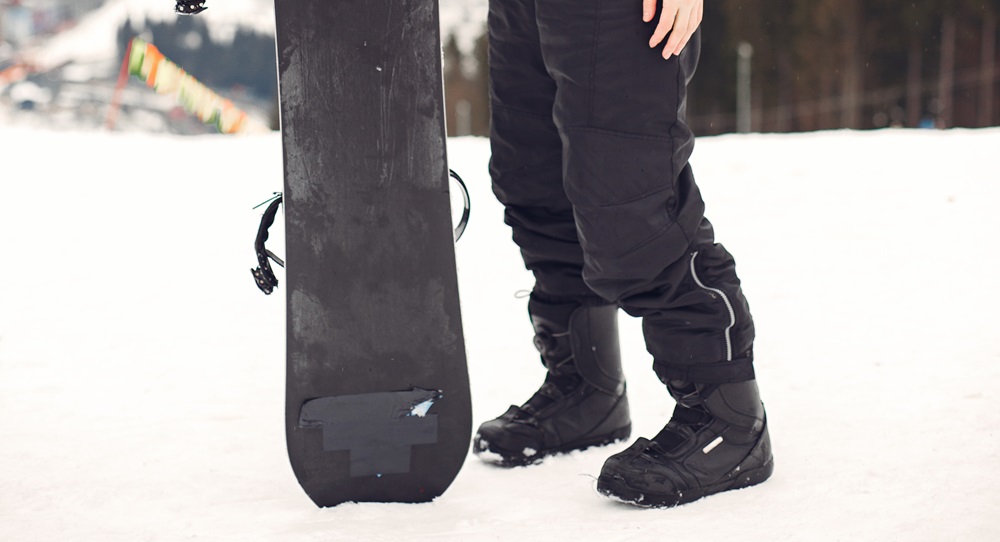
You know that feeling when your boots drag through the snow mid-turn? That’s boot overhang at work, and it’s more than just annoying—it messes with your entire ride.
Getting the right match between your burton women snowboard boots (or any boots, really) and your board width makes the difference between smooth carves and constant edge catches.
The math behind binding compatibility isn’t rocket science, but most riders skip it entirely.
They grab a board, slap on some bindings, and hope everything works out. Sometimes it does. Often, it doesn’t.
What Happens When Your Boots Hang Over?
Boot overhang is exactly what it sounds like. Your boot sticks out past the edge of your board. A little bit is normal—even necessary. Too much, and you’ve got problems.
When you lean into a turn, your board tilts on edge. If your boots hang over too far, they hit the snow before your edge can bite properly. This is called boot-out or toe drag, and it kills your speed and control instantly.
The acceptable overhang range sits between 1-2 centimeters on each side. Less than one centimeter means you’re probably on too wide of a board, which makes it harder to get on edge quickly. More than two centimeters, and you’re risking drag on anything steeper than a beginner slope.
How Board Width Changes Everything?
Snowboard widths vary more than you’d think. A standard board runs 24-26 centimeters at the waist. Wide boards start around 26 centimeters and can push past 27 centimeters for bigger boots.
Here’s where it gets specific: if you wear a US men’s size 11 or larger, you need a wide board.
Women’s boots follow the same logic—anything above a US women’s size 10 usually needs extra width.
Your boot’s actual measurement matters more than the size printed inside. A size 10 boot from one brand might measure differently than another brand’s size 10.
Get out a ruler and measure from the widest point of your toe to the widest point of your heel.
The Real Numbers Behind Boot-to-Board Fit
| Boot Size (US Men’s) | Recommended Waist Width | Maximum Overhang |
| 8-9 | 24-25 cm | 1.5 cm per side |
| 9.5-10.5 | 25-26 cm | 1.7 cm per side |
| 11-12 | 26-27 cm | 2 cm per side |
| 12.5+ | 27+ cm (wide) | 2 cm per side |
These aren’t absolute rules. Your riding style changes things too. Aggressive carvers need tighter tolerances. Park riders can get away with slightly more overhang since they’re not tilting as hard into turns.
Calculating Your Actual Overhang
You need three measurements: boot length, board width, and binding stance width. The binding stance width determines how far apart your bindings sit, which slightly affects overhang angles.
Take your boot’s sole length in centimeters. Subtract your board’s waist width. Divide that number by two. That’s your overhang on each side.
Example: You’ve got boots that measure 30 centimeters from toe to heel. Your board is 25 centimeters wide at the waist. That’s five centimeters of difference, split into 2.5 centimeters per side. Way too much.
But wait—bindings add offset. Most bindings lift your boot slightly off the board surface and angle it. This reduces effective overhang by about 0.5-0.8 centimeters depending on the binding design and how you mount them.
So that 2.5-centimeter overhang might actually sit closer to 1.7-2 centimeters in practice. Still on the high side, but rideable for casual runs.
What About Binding Angles?
Your binding angle changes how your boot sits over the board. A duck stance (toes pointing outward on both feet) spreads your boot’s footprint differently than a forward stance.
Most riders run something between +15/-15 degrees for all-mountain riding. This creates more heel overhang on your front foot and more toe overhang on your back foot. If you’re already borderline on overhang, aggressive angles make it worse.
Reducing your angles to something like +12/-9 degrees pulls your boots in slightly. Not enough to fix a badly mismatched setup, but it can save you if you’re just barely over the limit.
The flip side: steeper angles give you better board control and quicker edge transitions. You’re trading some overhang safety for performance. Pick your priority based on how you actually ride.
How Binding Position Affects Contact Points?
Centered bindings put your boots at the widest part of the board’s waist. Sounds perfect, right? Not always.
Moving your bindings slightly toward the nose or tail changes which part of the board sits under your boot. Boards taper—they get narrower toward the tail. Shifting back even one or two centimeters can reduce overhang by a meaningful amount.
Some boards have progressive sidecuts that make the effective width under your bindings different from the listed waist width. Check where your bindings actually mount, then measure the board width at those specific points.
Testing Your Setup Before You Ride
Don’t wait until you’re halfway down a run to discover your boots drag. Set up your board at home. Strap in both feet. Rock the board fully on edge—like you’re carving hard. Watch where your boots land relative to the snow (or floor).
If your boots touch down before the board reaches about 60 degrees of tilt, you’ve got too much overhang. Most aggressive turns sit between 55-70 degrees depending on speed and conditions. You need clearance through that entire range.
A simple fix: try different binding mounting positions. Most binding patterns give you four or more mounting options. Moving one set of holes inward can reduce overhang without buying new gear.
When to Actually Get a Wider Board
You’ve adjusted your bindings, tweaked your angles, and you’re still dragging boots. Time for a wider board.
The switch to a wide board changes how the board rides. Wider boards feel more stable at speed but take more effort to tip on edge. They’re harder to spin and slower in tight trees. But if your boots need the space, you don’t have much choice.
The good news: modern wide boards ride way better than they used to. Better materials and construction techniques mean you won’t feel like you’re riding a cafeteria tray anymore.
Boot and board compatibility isn’t something you figure out once and forget. You change boots, you need to recalculate. You try a new board, same thing. The two-centimeter overhang rule keeps you safe, but your actual riding will tell you if something’s off. Pay attention to how your burton women snowboard boots interact with your board during those first few runs, and adjust before small problems become face-plants.
Frequently Asked Questions
How much boot overhang is acceptable with burton women snowboard boots?
Ans: Acceptable overhang is 1–2 centimeters per side. More than that increases the risk of toe drag and edge control issues.
What happens if your snowboard boots hang over too much?
Ans: Excess overhang causes boot-out, where boots hit the snow before the edge engages, reducing speed, control, and carving performance.
How do you calculate your actual boot overhang?
Ans: Subtract board waist width from boot sole length, divide by two, then account for 0.5–0.8 cm binding offset.
Do binding angles affect boot overhang?
Ans: Yes. More aggressive angles increase toe or heel overhang, while slightly reduced angles can pull boots inward slightly.
When should you switch to a wider snowboard?
Ans: If binding adjustments and angle changes don’t reduce overhang below two centimeters per side, a wider board is necessary.